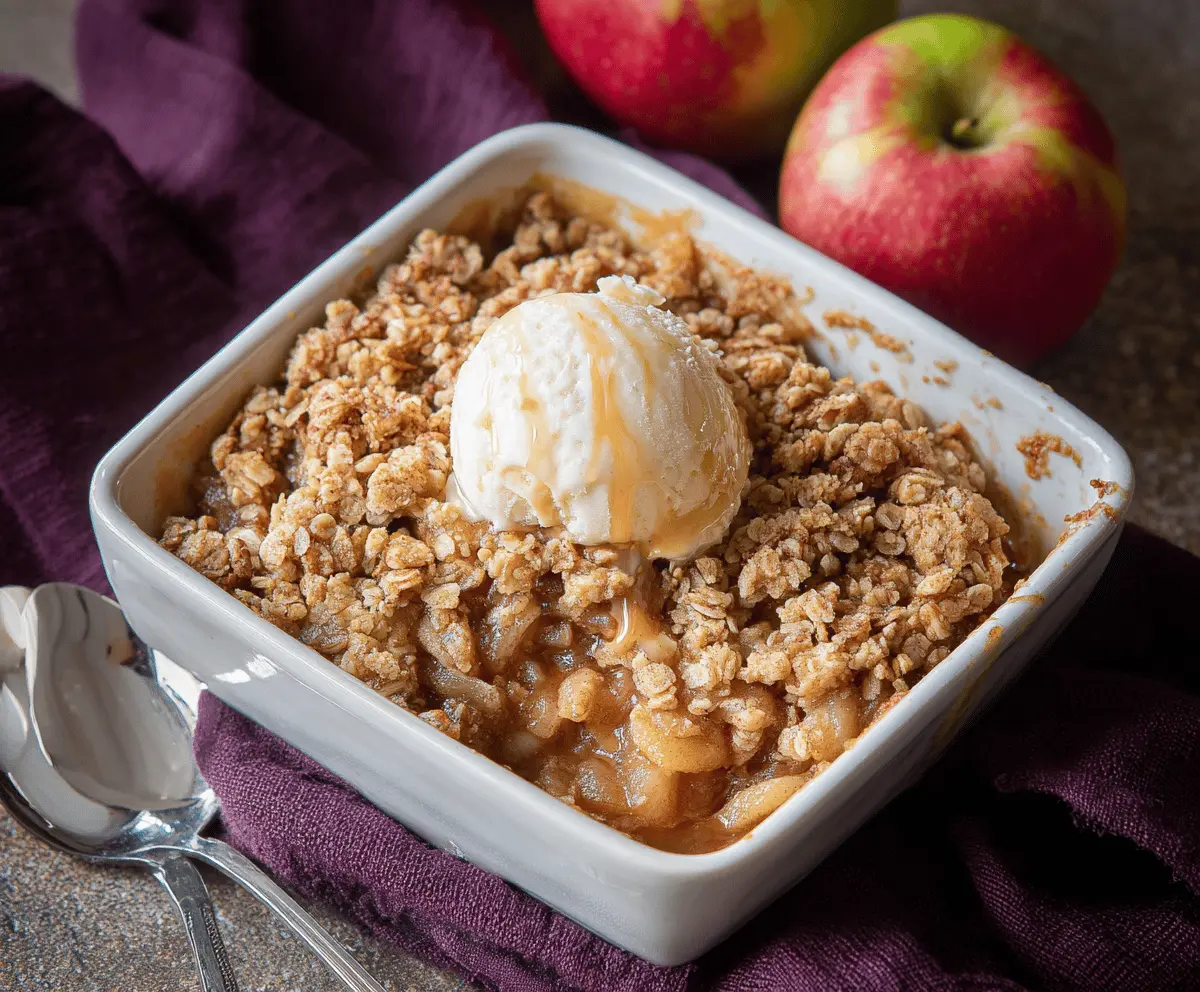
This Apple Cider Glazed Apple Crisp is like a warm hug in a bowl! Sweet, juicy apples mix perfectly with a crunchy, buttery topping, all brought together with a delicious apple cider glaze.
When I make this, my kitchen smells like a cozy fall festival! Serve it warm with a scoop of vanilla ice cream, and you’ll see why it’s a favorite in my house. It’s comfort food at its best! 🍏
Key Ingredients & Substitutions
Apples: A mix of tart and sweet apples, like Granny Smith and Honeycrisp, works best. If you can’t find those, feel free to use any apples you have at home. Just avoid varieties that are too mealy!
Lemon Juice: This helps prevent the apples from browning and adds a nice zesty flavor. If you’re out, a little vinegar or even orange juice can work as a substitute.
Apple Cider: The real star of the show! Fresh apple cider gives the best flavor, but if you’re in a pinch, you can use store-bought apple juice mixed with a bit of vinegar for added tang.
Unsalted Butter: For the topping, cold butter is key to getting that crumbly texture. If you’re looking for a dairy-free option, use coconut oil or a plant-based butter substitute.
How Do You Ensure the Apples Stay Tender and Delicious?
Getting your apples perfectly tender without them turning mushy is all about the baking time and prep. Start by slicing them uniformly—this helps them cook evenly. Here’s how to do it:
- Peel and core all your apples before slicing them into about 1/4 to 1/2-inch thick pieces.
- Mixing them with lemon juice right after slicing keeps them bright and adds flavor.
- During baking, check around the 30-minute mark. If they’re bubbling and the topping is golden, you’re in good shape!
Giving them a gentle toss in the warm apple cider glaze before baking lets the flavors blend nicely. You want that perfect balance: tender yet with just enough bite!
How to Make Apple Cider Glazed Apple Crisp
Ingredients You’ll Need:
For the Apple Filling:
- 5 large apples (a mix of tart like Granny Smith and sweet like Honeycrisp), peeled, cored, and sliced
- 1 tablespoon lemon juice
- 1/2 cup apple cider
- 1/4 cup granulated sugar
- 1/4 cup light brown sugar, packed
- 1 teaspoon ground cinnamon
- 1/4 teaspoon ground nutmeg
- 1/8 teaspoon salt
For the Crisp Topping:
- 1 cup old-fashioned rolled oats
- 1/2 cup all-purpose flour
- 1/2 cup light brown sugar, packed
- 1/2 teaspoon ground cinnamon
- 1/4 teaspoon salt
- 1/2 cup unsalted butter, cold and cut into small cubes
For the Apple Cider Glaze:
- 1/2 cup apple cider
- 1/4 cup granulated sugar
Optional:
- Vanilla ice cream or whipped cream for serving
How Much Time Will You Need?
This delightful dessert requires approximately 15 minutes of prep time and about 40-45 minutes of baking time, making it a total of around 1 hour! Perfect for a cozy evening at home, and it might be even quicker if you have a helper by your side!
Step-by-Step Instructions:
1. Preheat the Oven:
Start by preheating your oven to 350°F (175°C). Grease a 9×9-inch baking dish (or some individual ramekins) lightly with butter or cooking spray. This will help the crisp come out easily after baking!
2. Prepare the Apple Filling:
In a large mixing bowl, toss your sliced apples with lemon juice. This prevents them from browning and adds a bit of tangy flavor! Now, in a small saucepan, bring the apple cider to a gentle boil over medium heat. Add the granulated sugar and stir until it dissolves into a lovely syrupy glaze. Pour this warm glaze over the apples and give them a good stir.
3. Mix the Dry Ingredients:
Add the brown sugar, cinnamon, nutmeg, and salt to your apples, and stir until everything is well coated. Now, transfer this delicious mixture into your prepared baking dish.
4. Make the Crisp Topping:
In a separate bowl, combine the oats, flour, brown sugar, cinnamon, and salt. Add the cold, cubed butter next! Use your fingers or a pastry cutter to mix everything together until it forms coarse crumbs. You want that nice, crumbly texture!
5. Assemble the Crisp:
Evenly sprinkle the topping over the apple mixture in the baking dish. Make sure to cover the apples well—everyone loves a generous crunch on top!
6. Bake the Crisp:
Pop your baking dish into the oven and bake for about 40 to 45 minutes. Keep an eye out for a lovely golden brown topping and bubbly apples to know it’s finished!
7. Prepare the Apple Cider Glaze Drizzle:
While your crisp is baking, you can prepare the apple cider glaze drizzle. In a small saucepan, combine the remaining apple cider with the granulated sugar and simmer on medium heat. Reduce it until it thickens up and becomes syrupy, which should take about 10-15 minutes. Let it cool slightly before using.
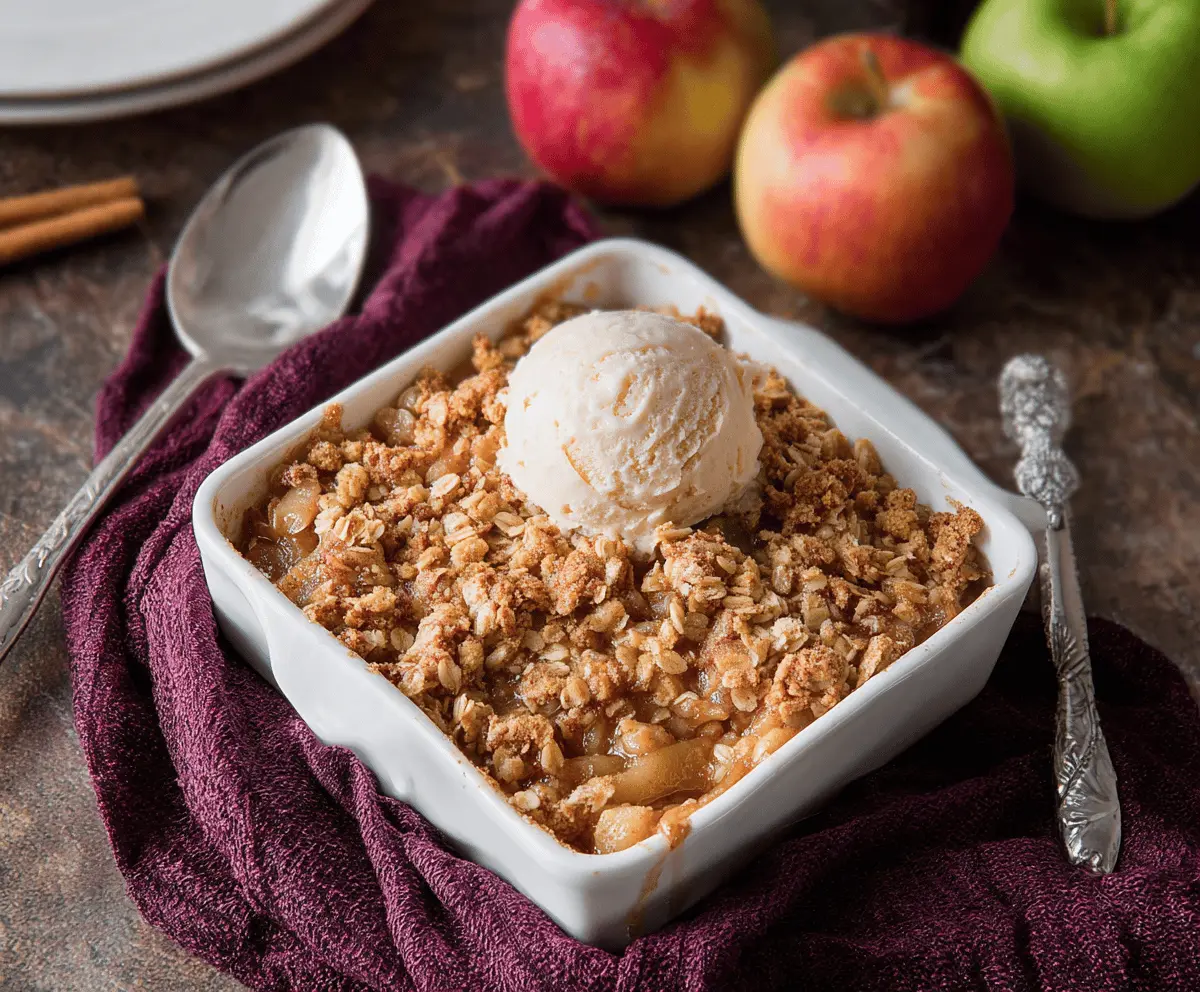
8. Serve and Enjoy:
Once the apple crisp is done baking, remove it from the oven and let it cool for about 10 minutes. Drizzle the apple cider glaze over the top of the crisp as a delightful finishing touch. Serve warm with a scoop of vanilla ice cream or whipped cream, if desired. It’s the perfect way to end any meal!
This Apple Cider Glazed Apple Crisp is a wonderful blend of sweet, spiced apple goodness, with a crunchy topping and a drizzle that ties everything together. Enjoy each comforting bite!
Can I Use Different Types of Apples?
Absolutely! A mix of tart and sweet apples, like Granny Smith and Honeycrisp, works best for a balanced flavor. Feel free to experiment with whatever apples you have on hand, but avoid overly mealy varieties for the best texture.
How Can I Make This Recipe Gluten-Free?
To make the Apple Cider Glazed Apple Crisp gluten-free, simply substitute the all-purpose flour with a gluten-free flour blend. Make sure to also check that your oats are certified gluten-free, as some brands may contain traces of gluten.
What if I Don’t Have Apple Cider?
If you don’t have apple cider, you can substitute it with apple juice, but consider adding a splash of vinegar (like apple cider vinegar) to mimic the tangy flavor. This will help bring a similar taste to the dish.
How Do I Store Leftovers?
Store any leftovers in an airtight container in the refrigerator for up to 3 days. To reheat, simply warm it in the oven or microwave. Enjoy it warm or at room temperature, and consider adding a little fresh glaze if needed!