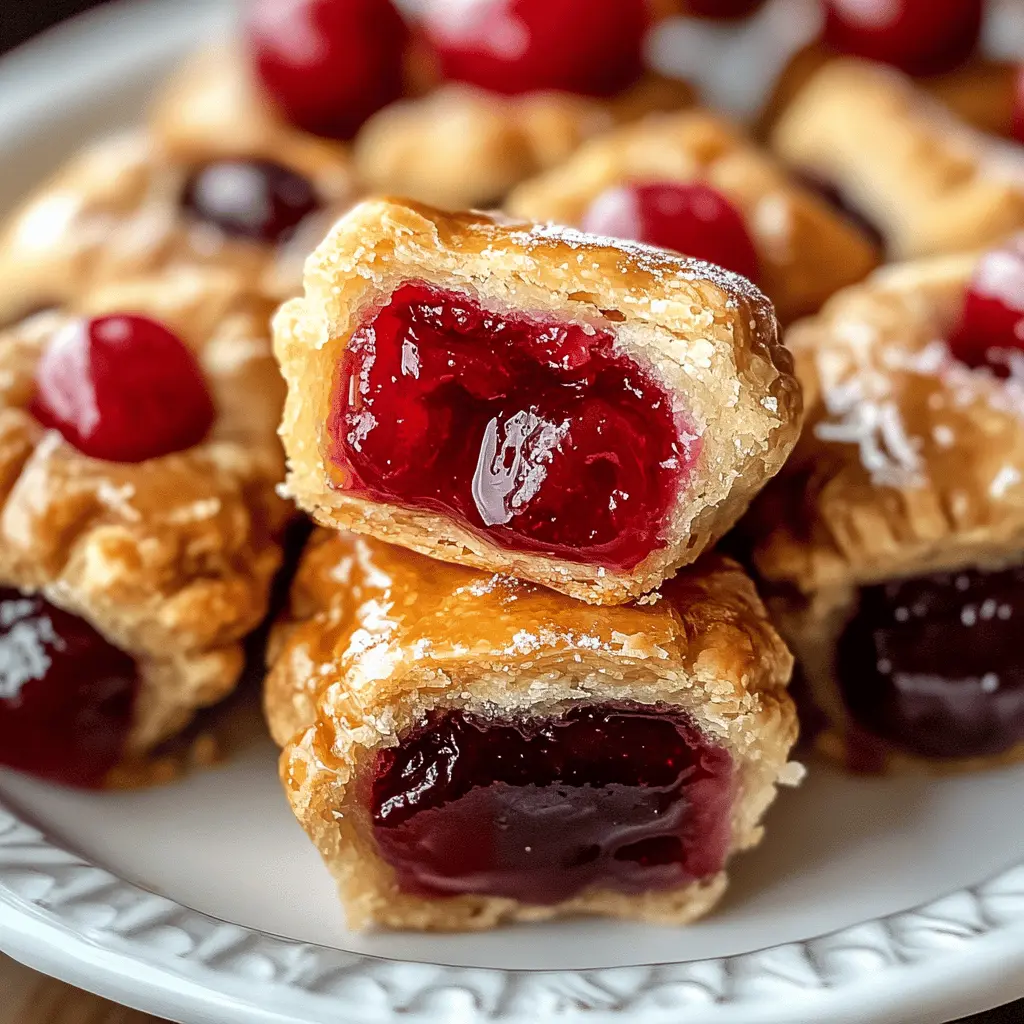
These Easy Cherry Pie Bites are packed with juicy cherry filling wrapped in a flaky pastry crust. They’re perfect for a quick treat any time of day!
With just a few simple steps, I can whip up these little delights. They always disappear fast at gatherings—I guess everyone loves a tasty bite-sized treat! 😊
Key Ingredients & Substitutions
Pie Crust Dough: I use refrigerated pie crust for convenience. If you’re feeling adventurous, you can make your own from scratch using flour, butter, and water. For a gluten-free option, look for gluten-free pie crusts available in stores.
Cherry Pie Filling: A can of cherry pie filling works well for ease. If you’d prefer fresh cherries, you can substitute them by cooking pitted cherries with sugar and a bit of cornstarch to thicken. Just let it cool before filling!
Egg Wash: The egg wash gives a beautiful golden color. If you want a vegan alternative, a mixture of almond milk and a bit of oil, or just milk on its own, works decently too.
How Do I Seal the Dough Properly?
Sealing the dough is crucial to keep the filling inside while baking. After placing cherry filling on the dough circle:
- Fold the dough carefully over the filling without squeezing it out.
- Pinch the edges together firmly, trying not to leave any holes. It helps to wet your fingers slightly with water to get a better seal.
- You can also use a fork to crimp the edges for added security and a decorative touch!
Taking your time here will ensure your pie bites hold together, so just be patient and enjoy the process!
Easy Cherry Pie Bites
Ingredients You’ll Need:
- 1 package (about 14 oz) refrigerated pie crust dough
- 1 can (21 oz) cherry pie filling
- 1 egg (for egg wash)
- 1 tablespoon water (for egg wash)
- Optional: powdered sugar for dusting or simple glaze for topping
How Much Time Will You Need?
This recipe will take about 10 minutes for preparation and around 15-18 minutes for baking. So, you can have these delicious cherry pie bites ready in just about 30 minutes!
Step-by-Step Instructions:
1. Preheat and Prep:
Start by preheating your oven to 375°F (190°C). While that’s heating up, grab a baking sheet and line it with parchment paper to keep your pies from sticking.
2. Roll Out the Dough:
Unroll the pie crust dough on a clean, flat surface. Using a small round cutter, about 2 to 3 inches in diameter, cut out circles. You should be able to get around 12-15 circles depending on how you space them out.
3. Fill the Dough:
Place about a teaspoon of cherry pie filling right in the center of each dough circle. Don’t overfill or your pies might burst open while baking!
4. Seal the Bites:
Fold the dough over the filling to create a pocket and pinch the edges tightly to seal them. You can smooth out the seams for a nice round shape. If you like, use a fork to press down along the edges for an extra seal and cute design!
5. Brush with Egg Wash:
In a small bowl, whisk the egg with water to create the egg wash. Use a pastry brush to coat the tops of each pie bite, which will give them a lovely golden color as they bake.
6. Bake!
Place the prepared pie bites on your lined baking sheet, leaving a little space between each one. Bake in your preheated oven for about 15-18 minutes, or until the crust is golden brown.
7. Cool and Serve:
Once they’re done baking, remove the pie bites from the oven and let them cool for a few minutes. If you want, sprinkle some powdered sugar on top or drizzle a simple glaze made from powdered sugar and milk for an extra touch of sweetness.
Enjoy your delicious, flaky cherry pie bites with gooey cherry filling!

FAQ for Easy Cherry Pie Bites
Can I Use Fresh Cherries Instead of Pie Filling?
Absolutely! You can use fresh cherries by pitting and cooking them with a bit of sugar and cornstarch until thickened. Let the mixture cool before using it as a filling to avoid soggy crusts.
How Do I Store Leftover Cherry Pie Bites?
Store any leftovers in an airtight container at room temperature for up to 2 days. If you want to keep them longer, refrigerate for up to a week—just reheat them in the oven for a few minutes to crisp the crust.
Can I Freeze These Pie Bites?
Yes, you can freeze them! Assemble the pie bites, but don’t bake them. Place them on a baking sheet to freeze individually, then transfer to a freezer bag once solid. Bake straight from the freezer, adding a few extra minutes to the baking time.
What Else Can I Use as a Filling?
Get creative! These bites are versatile. Try using apple pie filling, cream cheese mixed with fruit, or even a chocolate hazelnut spread for a different flavor. Just ensure the filling isn’t too runny!